Bathroom Cabinet Built Into Wall: A Comprehensive Guide
A bathroom cabinet built into the wall, often referred to as a recessed cabinet, represents a sophisticated and space-saving storage solution. Unlike traditional cabinets that protrude from the wall, these units are partially or entirely integrated within the wall’s framing, creating a cleaner aesthetic and maximizing usable space. This design choice is particularly advantageous in smaller bathrooms where every inch counts, but it also offers a sleek, modern look in larger spaces.
The installation of a recessed bathroom cabinet typically involves modifying the wall structure, making it essential to consider both the structural integrity of the wall and the existing plumbing and electrical wiring. Proper planning and execution are crucial to ensure a successful installation that not only looks aesthetically pleasing but also functions effectively for years to come. This article will provide a comprehensive overview of the key aspects of choosing, installing, and maintaining a bathroom cabinet built into the wall.
Key Considerations Before Installation
Before embarking on the installation of a recessed bathroom cabinet, several factors must be carefully evaluated. These considerations are critical for determining the feasibility of the project, ensuring the cabinet fits properly, and preventing potential problems during and after installation.
Wall Structure and Framing: The first and most important consideration is the wall’s construction. Recessed cabinets require a cavity within the wall, which means the wall must be thick enough to accommodate the cabinet’s depth without compromising its structural integrity. Typically, interior walls are framed with 2x4 studs, providing a cavity of approximately 3.5 inches. If the cabinet’s depth exceeds this, modifications to the wall may be necessary, which could involve reinforcing the existing framing or even building a new wall section. Load-bearing walls should never be altered without consulting a structural engineer, as this could jeopardize the stability of the entire building. Inspect the wall cavity for any obstructions such as pipes, wires, or ductwork. Rerouting these services can add significantly to the cost and complexity of the project, and in some cases, may make the installation impossible.
Cabinet Size and Placement: Determining the appropriate size and placement of the cabinet is crucial for ensuring both functionality and aesthetics. Measure the available wall space carefully, taking into account any existing fixtures such as sinks, toilets, or showers. Consider the desired height of the cabinet, keeping in mind the user's reach and accessibility. The cabinet should be positioned in a location that is convenient for accessing frequently used items, such as toiletries, medications, or cleaning supplies. Avoid placing the cabinet in areas that are prone to moisture, such as directly above a bathtub or shower, as this can damage the cabinet over time. When selecting a cabinet, pay attention to its dimensions, including the height, width, and depth. Ensure that the cabinet's depth will fit comfortably within the wall cavity, allowing for sufficient clearance for the door to open and close properly. Consider the swing direction of the door and whether it will interfere with any other fixtures or features in the bathroom.
Ventilation and Moisture Control: Bathrooms are inherently humid environments, and moisture can be detrimental to the longevity of a recessed cabinet. Adequate ventilation is essential to prevent the buildup of moisture within the cabinet and the surrounding wall cavity. Consider installing a ventilation fan in the bathroom to remove excess moisture after showers or baths. Ensure that the cabinet is constructed from moisture-resistant materials, such as solid wood, plywood with a water-resistant finish, or PVC. Avoid using particleboard or MDF, as these materials are prone to swelling and warping when exposed to moisture. Consider applying a sealant or caulk around the perimeter of the cabinet where it meets the wall to prevent moisture from seeping into the wall cavity. Regularly inspect the cabinet and the surrounding wall for any signs of moisture, such as discoloration, staining, or mold growth. Address any leaks or moisture problems promptly to prevent further damage.
Installation Process: A Step-by-Step Guide
The installation of a recessed bathroom cabinet is a multi-step process that requires careful planning and execution. While some homeowners may choose to tackle this project themselves, it is often advisable to hire a professional contractor to ensure a successful and safe installation.
Preparation and Demolition: Before beginning the installation, gather all the necessary tools and materials. These may include a stud finder, level, measuring tape, pencil, drywall saw, drill, screwdriver, hammer, safety glasses, and dust mask. Turn off the power to any electrical circuits that may be located within the wall cavity. Locate the wall studs using a stud finder and mark their positions on the wall. Using a drywall saw, carefully cut an opening in the wall that is slightly larger than the cabinet's dimensions. Be careful not to damage any pipes or wires that may be hidden within the wall. Remove any insulation or other materials that may be present in the wall cavity. Inspect the wall studs for any signs of damage or rot. If necessary, repair or replace any damaged studs.
Framing and Support: Once the opening is prepared, install additional framing to support the cabinet. This typically involves adding horizontal supports (headers and footers) between the existing studs. The headers and footers should be positioned at the top and bottom of the cabinet opening, respectively. Secure the headers and footers to the existing studs using screws or nails. Ensure that the framing is level and plumb. If the cabinet is particularly heavy, consider adding additional vertical supports (cripple studs) to further reinforce the framing. These cripple studs should be positioned between the headers and the existing studs. Verify that the cabinet fits snugly within the framed opening. If necessary, adjust the framing to ensure a proper fit.
Cabinet Installation and Finishing: Carefully insert the cabinet into the framed opening. Ensure that the cabinet is level and plumb. Secure the cabinet to the framing using screws or nails. Drive the screws or nails through the cabinet's side panels and into the framing studs. Conceal the screw or nail heads with wood filler or caulk. Apply a bead of caulk around the perimeter of the cabinet where it meets the wall. This will help to prevent moisture from seeping into the wall cavity. Patch any gaps or imperfections in the drywall around the cabinet using drywall compound. Sand the drywall compound smooth and prime the patched areas. Paint or wallpaper the patched areas to match the existing wall. Install the cabinet door and hardware according to the manufacturer's instructions. Test the door to ensure that it opens and closes smoothly and that it is properly aligned. Clean the cabinet and the surrounding area thoroughly.
Choosing the Right Cabinet Materials
The materials used in the construction of a recessed bathroom cabinet significantly impact its durability, aesthetics, and resistance to moisture. Selecting the right materials is crucial for ensuring that the cabinet withstands the humid bathroom environment and provides years of reliable service.
Wood and Wood Products: Solid wood is a popular choice for bathroom cabinets due to its natural beauty and durability. However, solid wood can be susceptible to warping and cracking in humid environments. Hardwoods such as oak, maple, and cherry are generally more resistant to moisture than softwoods such as pine. Plywood is a more stable and cost-effective alternative to solid wood. Plywood is made from multiple layers of wood veneer that are glued together, providing excellent strength and resistance to warping. Look for plywood that is specifically designed for use in humid environments, such as marine-grade plywood. Medium-density fiberboard (MDF) is a composite material made from wood fibers that are bonded together with resin. MDF is less expensive than solid wood and plywood, but it is also more susceptible to moisture damage. Avoid using MDF in areas that are prone to moisture, such as the interior of the cabinet. Particleboard is the least expensive and least durable option for bathroom cabinets. Particleboard is made from wood particles that are glued together, and it is highly susceptible to swelling and warping when exposed to moisture. Particleboard should be avoided in areas that are prone to moisture.
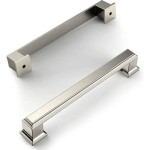
Hardware and Finishes: The hardware and finishes used on a recessed bathroom cabinet play a critical role in its overall appearance and functionality. Choose hardware that is durable, rust-resistant, and easy to operate. Stainless steel, brass, and chrome are good choices for bathroom hardware. The finish on the cabinet should be water-resistant and easy to clean. Paint, stain, and varnish are common choices for bathroom cabinet finishes. Opt for paints and stains that are specifically formulated for use in humid environments. Consider applying a sealant or topcoat to protect the finish from moisture and scratches. Glass shelves and doors can add a touch of elegance to a recessed bathroom cabinet. Tempered glass is a durable and safe option for bathroom applications. Mirror doors are a popular choice for bathroom cabinets, as they provide a convenient place to check your appearance. Choose a mirror that is resistant to fogging and that is easy to clean.
Moisture-Resistant Coatings and Sealants: To further protect the cabinet from moisture, consider applying a moisture-resistant coating or sealant. Polyurethane is a durable and water-resistant coating that can be applied to wood cabinets. Epoxy is another option for a moisture-resistant coating. Silicone caulk can be used to seal the perimeter of the cabinet where it meets the wall, preventing moisture from seeping into the wall cavity. Regularly inspect the cabinet and the surrounding area for any signs of moisture damage. Address any leaks or moisture problems promptly to prevent further damage.

35 Smart Bathroom Storage Ideas To Get Your Space Organized

Diy Built In Bathroom Shelves And Cabinet Angela Marie Made

The Open Concept Bathroom Holy Crap Is Right

Built Ins Niche Bathroom Cabinet

Recessed Wall Cabinet For Toilet Paper Storage Sawdust Girl

Diy Built In Bathroom Shelves And Cabinet Angela Marie Made

How To Make Built In Bathroom Cabinets

Recessed Wall Cabinet For Toilet Paper Storage Sawdust Girl

Diy Built In Bathroom Shelves And Cabinet Angela Marie Made

Built Into Wall Bathroom Cabinets Recessed

