How To Paint Already Painted Cabinets
Painting already painted cabinets is a cost-effective and impactful way to refresh a kitchen or bathroom without the expense of replacing the cabinets entirely. While it requires time and effort, the result can dramatically alter the aesthetic of a space. The success of the project hinges on thorough preparation, proper techniques, and the selection of appropriate materials. This article provides a comprehensive guide to painting already painted cabinets, covering each step from initial assessment to final application.
Key Point 1: Preparation is Paramount
The most crucial aspect of painting cabinets is preparation. This phase determines how well the new paint adheres and the overall longevity of the finished project. Skimping on preparation will inevitably lead to chipping, peeling, and a lackluster appearance.
The initial step involves a thorough cleaning. Cabinets accumulate grease, grime, and dust over time, which can interfere with paint adhesion. A degreasing cleaner, such as trisodium phosphate (TSP) or a TSP substitute, should be used to scrub all surfaces. Follow the manufacturer's instructions for dilution and application. Be sure to wear appropriate protective gear, including gloves and eye protection. Wipe down the cabinets with clean water after cleaning to remove any residue.
After cleaning, inspect the cabinets for any damage, such as chips, dents, or scratches. Fill these imperfections with wood filler, applying it smoothly and allowing it to dry completely according to the manufacturer's instructions. Once the filler is dry, sand it smooth using fine-grit sandpaper. This ensures a seamless surface for painting.
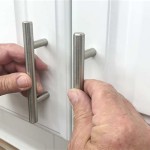
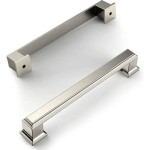
Remove all hardware, including knobs, pulls, hinges, and door latches. This prevents paint from getting on the hardware and allows for a cleaner, more professional finish. Label each piece of hardware and its corresponding location to simplify reinstallation later. Store the hardware in a safe place to prevent loss or damage. If desired, consider replacing outdated hardware with new pieces to further enhance the refreshed look of the cabinets.
The next crucial step is sanding. Sanding provides a "tooth" for the new paint to grip onto. Use medium-grit sandpaper (around 120-150 grit) to lightly sand all surfaces of the cabinets. The goal is not to remove the existing paint entirely, but rather to roughen the surface slightly. Focus on areas that are particularly glossy or smooth. After sanding, use a tack cloth or a damp cloth to remove all sanding dust. Even a small amount of dust can create imperfections in the paint finish.
Masking is essential to protect surrounding areas from paint splatters and drips. Use painter's tape to carefully mask off walls, countertops, appliances, and flooring. Cover any exposed areas with drop cloths to prevent paint from getting on surfaces that are not being painted. Take your time and ensure that the masking is secure and covers all necessary areas.
Key Point 2: Priming for Adhesion and Uniformity
Priming is a critical step that is often overlooked, but it plays a vital role in the success of the paint job. Primer creates a uniform surface, blocks stains, and enhances the adhesion of the topcoat. Choosing the right primer is essential for achieving a professional-looking finish.
For already painted cabinets, an adhesion primer is generally recommended. These primers are designed to bond to difficult surfaces, such as glossy finishes or laminate. Some popular options include bonding primers, shellac primers, and multi-surface primers. Read the product labels carefully to ensure that the primer is compatible with the existing paint and the topcoat you plan to use.
Apply the primer in thin, even coats using a high-quality brush, roller, or sprayer. A brush is best for detailed areas, such as corners and edges, while a roller is ideal for larger, flat surfaces. A sprayer can provide a smooth, even finish, but it requires more skill and careful masking to prevent overspray. If using a sprayer, follow the manufacturer's instructions for thinning the primer and adjusting the spray settings. Allow the primer to dry completely according to the manufacturer's instructions before proceeding to the next step.
After the primer has dried, inspect the surface for any imperfections. If necessary, lightly sand the primer with fine-grit sandpaper to smooth out any brush strokes or roller marks. Remove any sanding dust with a tack cloth or damp cloth. Apply a second coat of primer if desired to ensure complete coverage and optimal adhesion.
Proper ventilation is important when working with primers and paints. Open windows and doors or use a fan to circulate air. Wear a respirator or mask to protect yourself from fumes. Follow all safety precautions outlined on the product labels.
Key Point 3: Painting Techniques and Topcoat Selection
The selection of the right topcoat and the application technique are critical for achieving a durable and aesthetically pleasing finish. The topcoat provides the color, sheen, and protection against wear and tear.
Several types of paint are suitable for cabinets, including alkyd (oil-based) paint, latex (water-based) paint, and acrylic paint. Alkyd paint is known for its durability and smooth finish, but it has a strong odor and requires mineral spirits for cleanup. Latex paint is easier to work with, has low odor, and cleans up with soap and water, but it may not be as durable as alkyd paint. Acrylic paint offers a good balance of durability, ease of use, and low odor. Consider the pros and cons of each type of paint before making a selection.
Choose a sheen that is appropriate for cabinets. Semi-gloss and gloss sheens are popular choices because they are durable and easy to clean. Satin and eggshell sheens offer a softer look, but they may be more prone to showing dirt and fingerprints. Consider the overall aesthetic you are trying to achieve when selecting the sheen.
Apply the paint in thin, even coats using a high-quality brush, roller, or sprayer. Similar to priming, a brush is best for detailed areas, a roller is ideal for larger surfaces, and a sprayer can provide a smooth, even finish. Avoid applying too much paint at once, as this can lead to drips and runs. Allow each coat of paint to dry completely according to the manufacturer's instructions before applying the next coat.
Lightly sand between coats of paint with fine-grit sandpaper to remove any imperfections and create a smooth surface for the next coat. Remove any sanding dust with a tack cloth or damp cloth. Apply at least two coats of paint for optimal coverage and durability. For dark colors or surfaces with significant color variation, three coats may be necessary.
Allow the final coat of paint to dry completely before reinstalling the hardware. Use a screwdriver to carefully reattach the knobs, pulls, hinges, and door latches. Avoid over-tightening the screws, as this can damage the cabinets. Inspect the finished cabinets for any imperfections and touch up any areas as needed.
Once the paint is fully cured, which can take several days to a week, clean the cabinets with a mild soap and water. Avoid using harsh chemicals or abrasive cleaners, as these can damage the paint finish. Regular cleaning will help to keep the cabinets looking their best for years to come.
Consider adding a clear coat of polyurethane or varnish for added protection, particularly in high-traffic areas or kitchens with frequent spills. Apply the clear coat in thin, even coats using a brush, roller, or sprayer. Allow the clear coat to dry completely according to the manufacturer's instructions. Lightly sand between coats of clear coat with fine-grit sandpaper to smooth out any imperfections. Apply at least two coats of clear coat for optimal protection.
Careful planning, meticulous preparation, and proper application techniques are essential for achieving a professional-looking paint job. By following these guidelines, already painted cabinets can be transformed, providing a fresh and updated look to the space.

Avoid These Mistakes How To Paint Cabinets That Are Already Painted Grace In My Space

How To Repaint Kitchen Cabinets Painted By Kayla Payne

Do It Yourself Divas Diy How To Paint Over Red Painted Cabinets Walls

Avoid These Mistakes How To Paint Cabinets That Are Already Painted Grace In My Space

Painted Kitchen Cabinets One Year Later The Palette Muse

Best Practices For Painting Over Painted Cabinets The Morris Mansion

How To Paint Kitchen Cabinets A Step By Guide Confessions Of Serial Do It Yourselfer

How To Paint Old Kitchen Cabinets Save Yourself 1 000s Builds By Maz

The Average Diy Girl S Guide To Painting Cabinets

How To Paint Kitchen Cabinets The Love Notes Blog