Here is an article about placing cabinet knobs, written in an expository style, using the requested tags and specifications.
How To Place Cabinet Knobs: A Comprehensive Guide
Proper placement of cabinet knobs is a crucial detail that can significantly impact the functionality and aesthetics of any kitchen, bathroom, or storage space. While seemingly straightforward, correctly positioning knobs ensures easy access, comfortable use, and a visually balanced design. This article provides a detailed guide on how to place cabinet knobs, covering essential measurements, techniques, and considerations for various cabinet styles.
Before initiating the installation process, careful planning is paramount. This involves evaluating the existing cabinet layout, identifying the dominant design style, and selecting knobs that complement the overall aesthetic. Accurate measurement and marking are essential for achieving consistent and professional results. Neglecting these preliminary steps can lead to misaligned knobs, requiring rework and potentially damaging the cabinet doors and drawers.
The selection of appropriate tools is equally important. A power drill, drill bits of the correct size for the knob screws, a measuring tape, a pencil, a level, and a center punch are generally required. A cabinet hardware jig can also be a valuable asset, particularly for large-scale installations, as it ensures consistent placement and eliminates the risk of errors. Safety glasses are recommended to protect the eyes from debris during the drilling process.
Determining Vertical Placement for Cabinet Doors
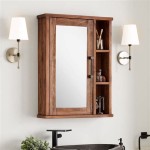
Vertical placement on cabinet doors is often dictated by the door style. For standard cabinet doors, a common guideline is to position the knob approximately 2 to 3 inches from the bottom corner of the upper cabinets and 2 to 3 inches from the top corner of the lower cabinets. This measurement provides a comfortable grip and visually aligns the knobs.
However, this guideline may need adjustment based on specific design elements. For example, if the cabinet doors feature raised panels or decorative molding, the knob should be positioned to avoid obstructing these features. In such cases, it may be necessary to move the knob slightly to the left or right to achieve a more balanced appearance.
For taller cabinet doors, exceeding 36 inches in height, consider a slightly higher or lower placement to maintain visual proportion. Experimenting with different positions using temporary adhesive putty can help determine the most aesthetically pleasing location before committing to drilling. The goal is to create a sense of balance and avoid the knob appearing too high or too low on the door.
The placement must also be consistent across all cabinet doors within the same run. This requires careful measurement and marking to ensure that the knobs are all aligned at the same height. Using a level to draw a horizontal line across the doors can serve as a visual guide during the marking process. Any discrepancies in placement will be immediately noticeable and will detract from the overall appearance.
Furthermore, consider the placement of any adjacent appliances or fixtures. Ensure that the knobs do not interfere with the operation of dishwashers, refrigerators, or other appliances. Allow sufficient clearance to prevent the knobs from bumping into surrounding surfaces, which can lead to damage over time. Careful planning and consideration of the surrounding environment are essential for a successful installation.
Horizontal Placement for Drawers
Horizontal placement on drawers is generally simpler than vertical placement on doors. For drawers less than 18 inches wide, a single knob positioned in the center of the drawer front is typically the most appropriate choice. Centering the knob provides a balanced and symmetrical appearance.
To locate the center of the drawer front, measure the width and divide by two. Use a pencil to mark the center point, ensuring that the mark is precise. A center punch can be used to create a small indentation at the mark, which will help to prevent the drill bit from slipping during the drilling process. This indentation is particularly important when drilling into hardwood or other dense materials.
For drawers wider than 18 inches, consider using two knobs instead of one. This provides a more balanced appearance and distributes the force required to open the drawer. When using two knobs, position them equidistant from the center of the drawer front. A common guideline is to place the knobs approximately one-third of the way in from each side of the drawer.
The exact placement of the knobs will depend on the drawer style and personal preference. For drawers with recessed panels or decorative molding, position the knobs to avoid obstructing these features. Experiment with different positions using temporary adhesive putty to determine the most aesthetically pleasing location. Consider the weight of the drawer and the types of items that will be stored inside. Heavier drawers may benefit from knobs that are positioned closer to the edges, providing better leverage and easier opening.
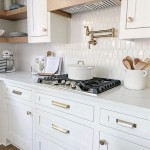
When installing two knobs on a drawer, ensure that they are perfectly level with each other. Use a level to draw a horizontal line across the drawer front, and then position the knobs along this line. Any discrepancies in level will be immediately noticeable and will detract from the overall appearance. This is especially crucial in kitchens or bathrooms where symmetry is a design priority.
In some instances, homeowners might elect to use pulls instead of knobs on drawers. Pulls offer a more substantial grip and can be easier to use, especially for individuals with arthritis or limited hand strength. The placement of pulls follows similar principles to knobs, with the primary consideration being balanced aesthetics and ease of use.
Drilling and Installation Techniques
Once the knob positions have been marked, the next step is to drill the holes. Use a drill bit that is slightly larger than the diameter of the knob screws. This will allow for easy installation and prevent the screws from stripping the wood. A common mistake is to use a drill bit that is too small, which can make it difficult to tighten the screws and can potentially damage the cabinet doors or drawers.
Before drilling, place a piece of masking tape over the marked area to prevent chipping or splintering of the finish. The tape will provide a clean surface for the drill bit to grip, resulting in a smoother hole. This is especially important when drilling into painted or laminated surfaces. Start by drilling a pilot hole using a smaller drill bit. This will help to guide the larger drill bit and prevent it from wandering.
Drill slowly and steadily, applying even pressure. Avoid forcing the drill bit, as this can cause the wood to split or crack. If you encounter resistance, stop and check that the drill bit is sharp and that you are using the correct size. Once the hole is drilled, remove any burrs or splinters using a countersinking tool or a utility knife.
Insert the knob screws through the back of the cabinet door or drawer and thread them into the knobs. Tighten the screws securely, but avoid over-tightening, as this can damage the knobs or the cabinet. Check the alignment of the knobs and make any necessary adjustments. If the knobs are not perfectly aligned, loosen the screws slightly and reposition them. Once the knobs are properly aligned, tighten the screws completely.
For cabinets with thin doors or drawers, it may be necessary to use shorter screws. Longer screws can protrude through the back of the cabinet, posing a safety hazard. Measure the thickness of the cabinet and select screws that are slightly shorter. Alternatively, you can use washers to reduce the length of the screws. Always prioritize safety and ensure that the screws are securely fastened without protruding.
After installation, inspect the knobs thoroughly to ensure that they are properly aligned and securely attached. Check for any loose screws or damaged surfaces. If any problems are detected, correct them immediately. Periodically check the knobs to ensure that they remain tight and aligned. Loose knobs can damage the cabinet doors or drawers over time.
Properly placed cabinet knobs enhance both the functionality and the visual appeal of cabinetry. Adhering to these guidelines promotes a professional and aesthetically pleasing finish, maximizing the usability and longevity of the cabinets.

Cabinet Hardware Placement Guide

How To Place Cabinet Knobs Pulls

How To Place Cabinet Knobs Pulls

Tips For Cabinet Hardware Placement Knobs Are Placed Opposite Of Pontis Construction

Cabinet Hardware Placement Guide

A Simple Guide For Ideal Cabinet Knob Placement

The Ultimate Guide For Cabinet Hardware Placement And Sizing

Design 101 Cabinet Hardware Placement Lark Linen

Design 101 Cabinet Hardware Placement Lark Linen

Set It And Forget Small Spikes Help Keep Knobs In Place Amerock
See Also