```html
Kitchen Cabinet Light Rail Molding: Enhancing Functionality and Aesthetics
Kitchen cabinet light rail molding, often simply referred to as light rail, is a decorative and functional trim piece installed on the underside of wall cabinets. Its primary purpose is to conceal under-cabinet lighting, but it also contributes significantly to the overall aesthetic appeal of the kitchen. This molding provides a finished, polished look, preventing direct visibility of the lighting fixtures and wiring. Understanding the different types, installation methods, and design considerations associated with light rail molding is essential for achieving a professional and visually appealing kitchen renovation or upgrade.
The application of light rail molding extends beyond mere concealment. It contributes to the creation of a layered and textured visual effect, adding depth and sophistication to cabinetry. By masking the often-utilitarian appearance of under-cabinet lighting, light rail molding elevates the kitchen's design, transforming it into a more inviting and aesthetically pleasing space. Furthermore, it protects the lighting fixtures from dust, grease, and other kitchen contaminants, prolonging their lifespan and maintaining their performance. The careful selection of light rail molding allows homeowners to customize their kitchen's design, complementing existing cabinetry styles and creating a cohesive and harmonious look.
Key Point 1: Types of Light Rail Molding
Light rail molding is available in a variety of materials, profiles, and finishes, each offering distinct advantages and aesthetic qualities. The selection of the appropriate type depends on the desired look, the existing cabinetry style, and budgetary constraints. Common materials include wood, MDF (Medium-Density Fiberboard), and PVC. Each material offers different properties in terms of durability, moisture resistance, and ease of installation.
Wood Light Rail Molding: Solid wood light rail molding offers a classic and timeless aesthetic. It can be stained or painted to match existing cabinetry, providing a seamless and integrated look. Wood options include hardwoods like maple, oak, and cherry, as well as softwoods like pine. Hardwoods are generally more durable and resistant to dents and scratches, while softwoods are more affordable and easier to work with. Wood light rail molding is typically more expensive than MDF or PVC options, but its natural beauty and durability make it a worthwhile investment for many homeowners.
MDF Light Rail Molding: MDF is a composite material made from wood fibers and resin. It is a popular choice for light rail molding because it is dimensionally stable, meaning it is less likely to warp or crack than solid wood. MDF is also relatively inexpensive and easy to paint, making it a versatile option for a variety of kitchen styles. While MDF is not as moisture resistant as PVC, it can be used in kitchens with proper ventilation and moisture control. Careful sealing and priming are essential before painting to prevent moisture absorption.
PVC Light Rail Molding: PVC (Polyvinyl Chloride) is a plastic material that is highly resistant to moisture, making it an ideal choice for kitchens and bathrooms. PVC light rail molding is also resistant to insects and rot, ensuring its long-term durability. It is available in a variety of colors and finishes, including wood grain patterns, providing a cost-effective and low-maintenance alternative to wood. PVC is generally the least expensive option for light rail molding, but it may not offer the same aesthetic appeal as wood or MDF for some homeowners. Furthermore, it is important to select high-quality PVC to avoid yellowing or discoloration over time.
Beyond the core materials, the profile of the light rail molding also significantly impacts its aesthetic appeal. Common profiles include simple, straight edges, decorative curves, and intricate carvings. The chosen profile should complement the overall style of the kitchen cabinetry and other architectural details. For example, a contemporary kitchen might benefit from a sleek, minimalist light rail molding, while a traditional kitchen might incorporate a more ornate and decorative option.
Key Point 2: Installation Techniques and Considerations
The proper installation of light rail molding is crucial for achieving a professional and functional result. Incorrect installation can lead to unsightly gaps, uneven lines, and potential damage to the cabinetry. Careful planning, precise measurements, and the use of appropriate tools are essential for a successful installation. Several methods can be employed, each with its own advantages and disadvantages.
Direct Attachment with Screws: This is a common and relatively straightforward method. The light rail molding is directly attached to the underside of the cabinet using screws. It is important to pre-drill pilot holes to prevent the wood from splitting and to ensure that the screws are properly aligned. The screws should be countersunk so that they are flush with the surface of the molding. This method provides a secure and durable attachment, but it may require patching and painting the screw holes for a seamless finish.
Using Construction Adhesive: Construction adhesive can be used to bond the light rail molding to the underside of the cabinet. This method eliminates the need for screws, resulting in a cleaner and more seamless finish. However, it is important to use a high-quality construction adhesive that is specifically designed for bonding wood or MDF to painted surfaces. The adhesive should be applied evenly to the back of the molding, and the molding should be held in place with clamps or tape until the adhesive has fully cured. This method requires careful surface preparation to ensure proper adhesion.
Combination of Screws and Adhesive: This method combines the strengths of both techniques. Construction adhesive is used to bond the molding to the cabinet, and screws are used to provide additional support and secure the molding in place while the adhesive cures. This method offers a strong and durable attachment, while also minimizing the visibility of screws. It is generally considered the most reliable and professional installation method.
Regardless of the chosen method, accurate measurements are critical. Measure the length of the underside of the cabinets where the light rail molding will be installed. Cut the molding to the exact length, ensuring that the ends are square. Use a miter saw for making precise cuts, especially when dealing with angled corners. Test-fit the molding before permanently attaching it to ensure a proper fit. Remember to account for any corners or obstructions that may require special cuts or modifications.
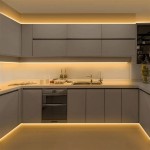
Furthermore, consider the placement of the under-cabinet lighting when installing the light rail molding. The molding should be positioned to effectively conceal the lighting fixtures and wiring, while also allowing for adequate light distribution. Experiment with different positions to find the optimal balance between concealment and illumination. Ensure that the wiring is properly routed and secured to prevent it from interfering with the molding or creating a safety hazard.
Key Point 3: Design Considerations and Aesthetic Integration
Light rail molding is not just a functional element; it is also an integral part of the kitchen's overall design. The selection of the appropriate style, finish, and profile can significantly enhance the aesthetic appeal of the cabinetry and the entire kitchen space. Carefully consider the existing design elements and architectural details when choosing light rail molding to ensure a cohesive and harmonious look.
Matching Cabinetry Style: The light rail molding should complement the style of the existing kitchen cabinetry. For example, a traditional kitchen with raised-panel cabinets might benefit from a more ornate and decorative light rail molding with intricate carvings. A contemporary kitchen with flat-panel cabinets might be better suited to a simple and minimalist light rail molding with clean lines. Choosing a light rail molding that is consistent with the cabinetry style will create a unified and visually appealing design.
Coordinating Finishes: The finish of the light rail molding should coordinate with the finish of the cabinetry. If the cabinets are painted, the light rail molding should be painted the same color or a complementary color. If the cabinets are stained, the light rail molding should be stained the same color or a coordinating stain. Consider the overall color palette of the kitchen when selecting the finish for the light rail molding. A subtle contrast can add visual interest, but avoid clashing colors that can disrupt the overall harmony of the space.
Considering Lighting Type: The type of under-cabinet lighting will influence the design of the light rail molding. For example, LED strip lighting can be easily concealed behind a simple light rail molding, while puck lights may require a deeper molding to fully conceal the fixtures. Ensure that the light rail molding is adequately sized to accommodate the chosen lighting fixtures and to provide sufficient light distribution. Consider the color temperature of the lighting and how it will interact with the surrounding surfaces and materials.
Adding Decorative Elements: Light rail molding can be used to add decorative elements to the kitchen. Consider adding small details such as rosettes, corner blocks, or decorative trim to the molding to enhance its aesthetic appeal. These details can be used to create a custom and personalized look that reflects the homeowner's individual style. Be mindful of overdoing it; too many decorative elements can make the kitchen look cluttered and overwhelming.
In summary, kitchen cabinet light rail molding is a versatile and valuable addition to any kitchen renovation or upgrade. By carefully considering the different types, installation methods, and design considerations, homeowners can create a functional and visually appealing space that enhances both the practicality and the beauty of their kitchen. The selection and installation of light rail molding represents a crucial step in achieving a polished and professional finish.
```
Light Rail Molding The Ultimate Guide

Light Rail Molding 1 Pcs Professional Cabinet Solutions Designer Kitchen Cabinetry

Image Result For Light Rail On Shaker Cabinets Kitchen With Crown Molding

Thomasville Embellishments Small Light Rail Moulding

Thomasville Embellishments Small Light Rail Moulding

Light Rail Moldings Cabinet Joint

Concave Light Rail Moulding Omega Cabinetry Embellishments

Light Rail Molding For Kitchen Cabinets Dura Supreme Cabinetry

How To Use Light Rail Moulding Osborne Wood Products Blog

What Is Light Rail Molding Dean Cabinetry


